Foundry season is back, and what a better way to kick it off than by testing out the
new burner? Since I was so confident it would work, I decided to use the opportunity to try casting the
soap dish again.
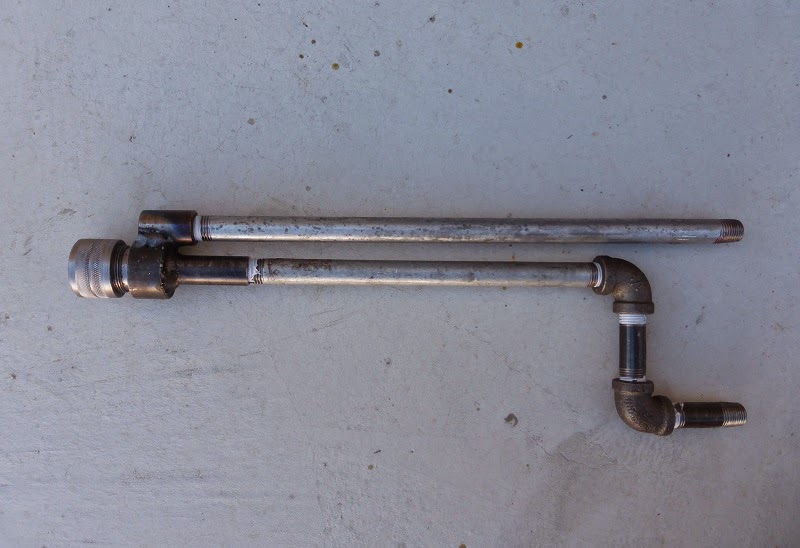
Here is the burner with the input pipes attached.
Like I did with the last burner, I set it up in a vise to hold it in position for testing. Eventually, this will be replaced by the blower input pipe, which the burner will be mounted in.
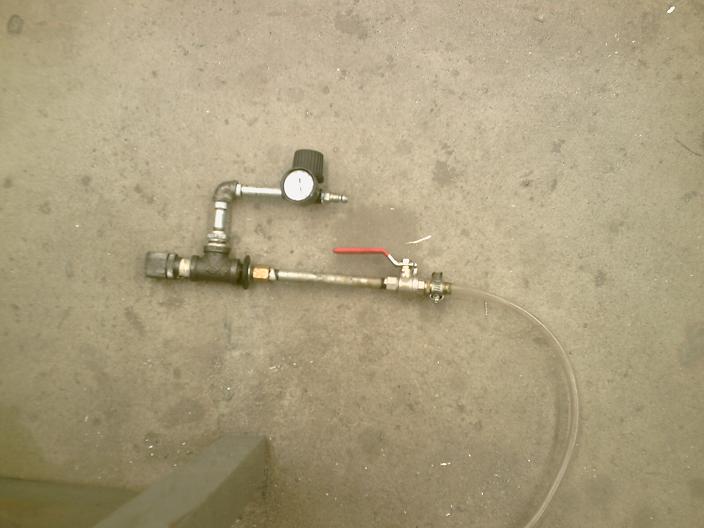
After finding all the pipe fittings, the burner was set up like this. As before, a hose connects the "garden sprayer" oil tank to the burner and a ball valve controls the flow. This is only temporary because the main purpose of this setup was just to make sure the burner would work at least as good as the last one.
This burner works exactly like the last one:
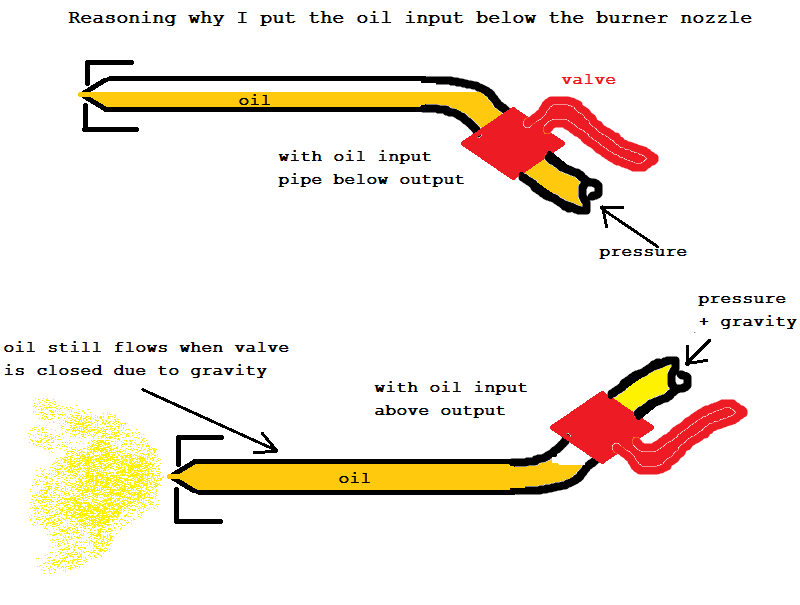
One thing I learned from the last burner was that if my oil line is pressurized, I should put the input below the outlet so gravity won't have any influence on the flow. In physics class they taught us some crap about the Bernoulli principle and the relationship between pressure and flow rate. Anyways, I think it confirms the following diagram:
 |
| "Delicious" used vegetable oil. |
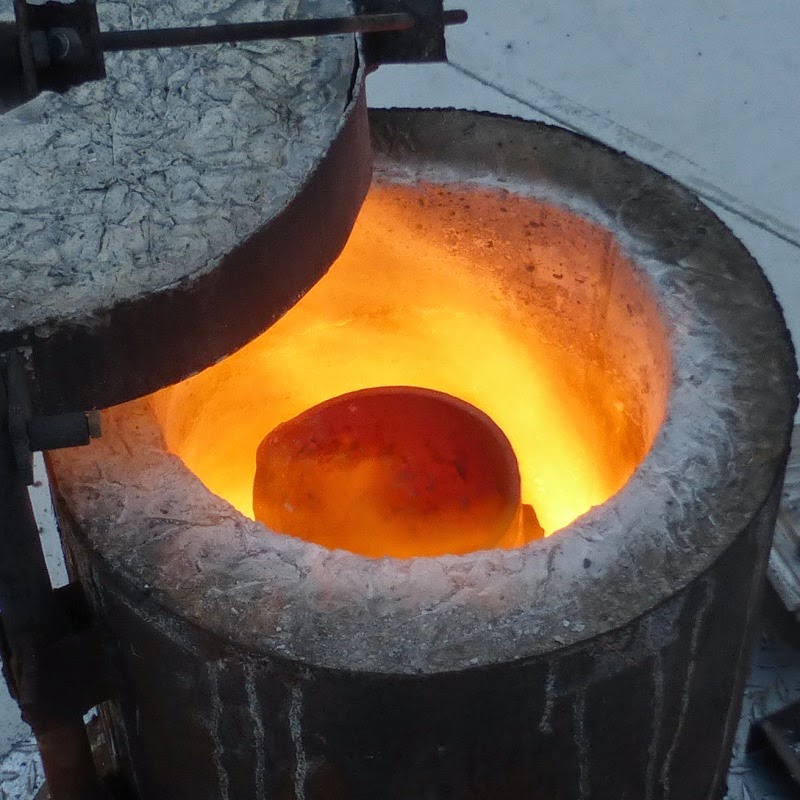
Starting the burner with a wood fire.
Then with the oil activated, I kept the lid off for the most part because otherwise the flame would go out. I observed this phenomenon last time, and I am mostly certain this is because there's not enough air (closing the lid cuts off air from the top). This will be fixed with the addition of the blower. I also had the same problem of not being able to get the oil flow rate just right. I had to have my hand on the valve the whole time going back and forth from barely closed to barely open. This is because a ball valve doesn't have that good of regulating ability for such small amounts.
I decided to try a different technique for casting the soap dish this time. Instead of pouring the metal into the mold with both halves connected, I thought I'd try pouring the aluminum into the bottom half of the mold and "squeeze molding" it. This attempt failed because the metal had already solidified by the time I could press the top half of the mold on it.
The finished products from today: two ingots, and a soap dish shaped piece of metal. On the bottom left corner of the soap dish piece, there is a cavity which is evidence of how much the metal shrank as it cooled. I was thinking of milling out the piece so it could hold soap, but the cavity would probably cause a huge hole in the bottom.
Conclusions:
The burner worked as anticipated, the next steps are to work out the blower situation to get more combustion air so it will burn hotter and with the lid closed. Also a new oil tank will be built to hold more oil, and will be pressurized by air instead of a hand pump. This in combination with a needle valve will make controlling the oil flow a lot easier.
CONTINUE TO PART 8 -- Building the new oil tank
BACK TO PART 6 -- New Oil Burner
BACK TO THE FOUNDRY MAIN PAGE


Hi, do you sell these?
ReplyDelete$599 U.S. dollars
Delete