So as I mentioned in the
headphone jack post, I wanted to build a stereo system for
my bike that could compete with traffic noise. Since this is southern California, that means a lot of
traffic to compete with. Here's what we have to work with:
double speaker - <$1 rummage sale
oval speakers - $3 thrift store
"160W" amp - $5 garage sale
motorcycle battery - $7 swap meet
switch - $3
random wood scraps, reused screws, cables and connectors - $0
Firstly, I wanted to make two identical speakers for the sake of symmetry, I took the original double speaker and cut a hole for one of the oval ones with a keyhole saw.
The other speaker cabinet was made from some foundry casting flask that was made from some scrap drawer unit. Since foundry season is a while away,
bike stereo took priority over casting flask. Here I am using some right angle vise to align the pieces of wood.
After screwing the sides together, I scribed the lines to cut for fitting the speakers with a pair of dividers. The oval was achieved by scribing circles of the minimum and maximum radii and then drawing an oval between them.
Then using the old fashioned way of hole saw to start the holes.
I was going to use the keyhole saw to finish the holes, but that would've taken forever, so I just put it in the mill and plunge cut the outline. The speaker didn't fit in the vise, so I took off half of it (far left of photo) and used a long clamp to hold it. Probably one of my worst setups ever.
After that, a lot of filing. In retrospect, I'm really glad I am just looking at a picture of it and not still doing it.
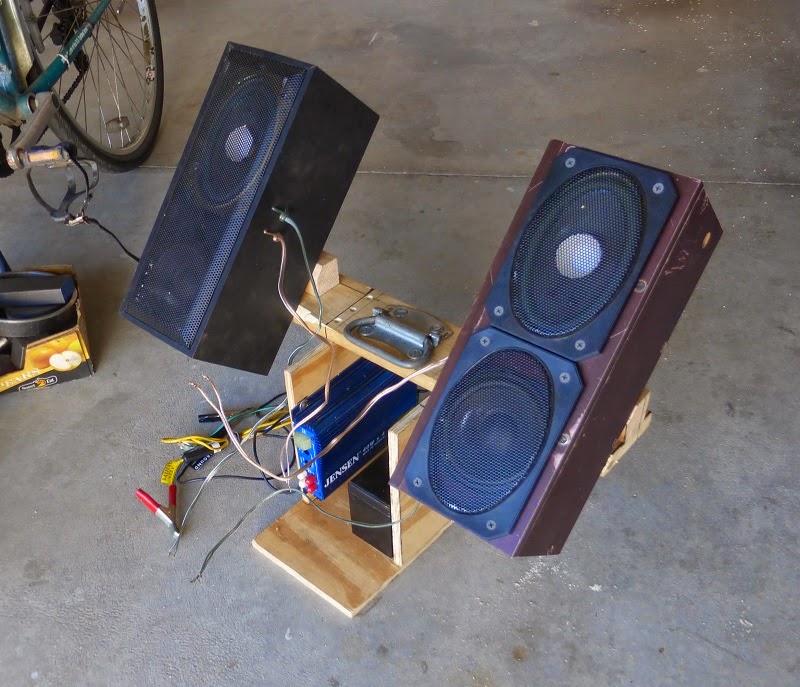
Then after a while, the speakers fit and look very much the same. I also used the hole saw to cut a hole in the back of the new speaker to allow air intake.
The amp has 4 separate outputs, so each speaker gets its own set of wires. The green ones correspond to the oval ones and the red with the round.
After a lot of soldering, wire stripping, and monster headaches, the system is tested. At this point is looks like a huge tangled mess, but it will make sense later. I discovered at this point that in order to get sound out of all 4 speakers, I needed input in all 4 inputs which was really lame. The screens used on the right speaker were the original ones that came with the oval speakers.
Alright, time to build the console. I measured the angle the speakers should make with my head while I'm sitting on the
bike, and it amazingly and conveniently was 45°. Therefore, I took some wood blocks, screwed them onto a beam and milled 45° angles where the speakers will go. Watch and learn.
Here is the base of the console. The bottom piece of plywood was cut to fit perfectly in the bottom of my front basket. There was space allocated for bungee cords in front and back.
Here the speakers were screwed onto the beam. This was a pain to do since I had to counter bore the screw holes since I didn't have screws long enough to go through the whole length of wood. I also put a handle on the top of the beam for ease of portability
Then after attaching the beam onto the base, the console is finished.
To deal with the problem of the 4 input fiasco, I soldered a TS to 4 RCA cable which was also a pain to do. Since I can make my own cables, my days of running to Radio Shack for adaptors are long gone. Also in this picture the method of securing the battery is visible. I just bent some galvanized sheet and screwed it on.
Oh yeah, I don't think even X-zibit could've pimped my ride this well. This system pumps! I know it is pretty heavy, but when my main priority is to
jam the box, weight ain't a concern.
Here's a closer view.
And here is a video of it in action.
Update:
I added some eyelet connectors and one of those in-line lamp switches to make powering off the system easier, and to make the connections more secure. Before this I was using the clamps in the above pictures to connect to the battery, and I had to unclamp the cables from the battery terminals to kill the power. The reason there are two red connectors is because the blue wire is the "sensor" input for the amp, it also has to be connected to the 12v (+) terminal for the amp to work.
See the new stereo here


No comments:
Post a Comment
Hi folks, please only leave comments relative to the blog post. All spam will be removed and spammers will be blocked.
Note: Only a member of this blog may post a comment.