The long awaited sequel to
part 1. When we last left our fender bracket adventure, the bracket for the rear fender remained unfixed. However, there were several other stays holding the fender on, so there was no urgency in repairing it. Over time, I'd been noticing the fender rattling more and more when going over bumpy terrain, so I figured it could do for a fix. The moral of the story last time was never use aluminum to hold stuff together, bend it, or use it ever!
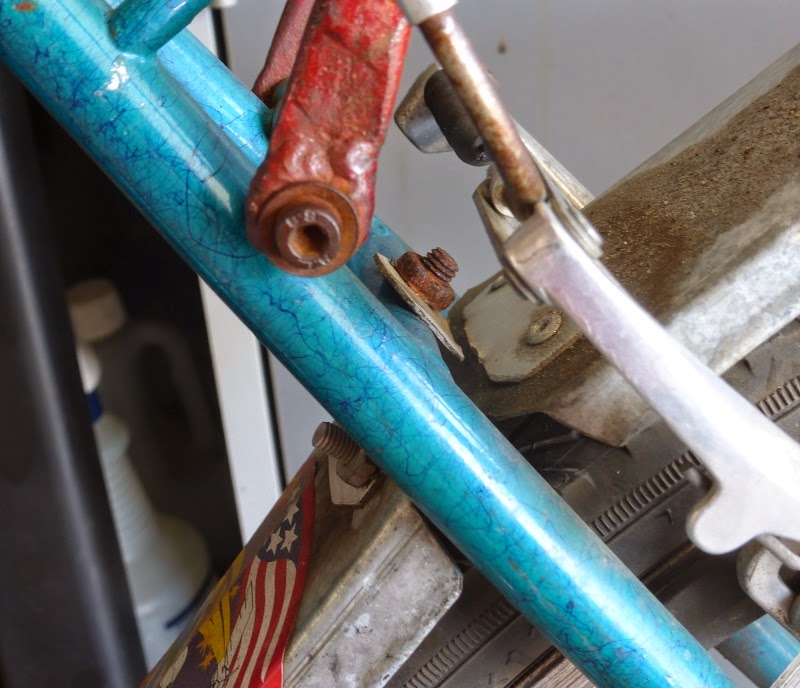 |
| Who needs lōctite when you got rust? |
My genius solution for removing the old bracket was to use my long 1/8" drill to remove the rivets. Of course I accidentally drilled to far and nearly punctured a hole in my tire! That's what I get for being too lazy to remove the fender, or at least the wheel!
The site of the old bracket was a bit dirty, so I cleaned it with some acetone which worked wonders. It didn't seem like a good idea to rivet something on with dirt between it.
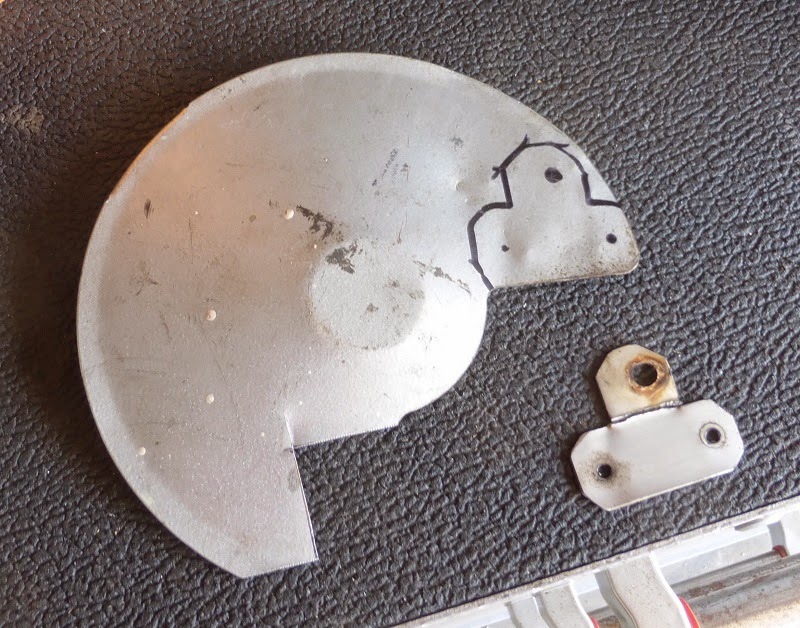
This time, the material of choice for the new bracket was some steel from the
terrible bench grinder guard. I'm definitely getting my $3 worth out of that grinder! Even though the old bracket was broken, I could still trace it onto the new piece so I wouldn't have to take the dimensions again.
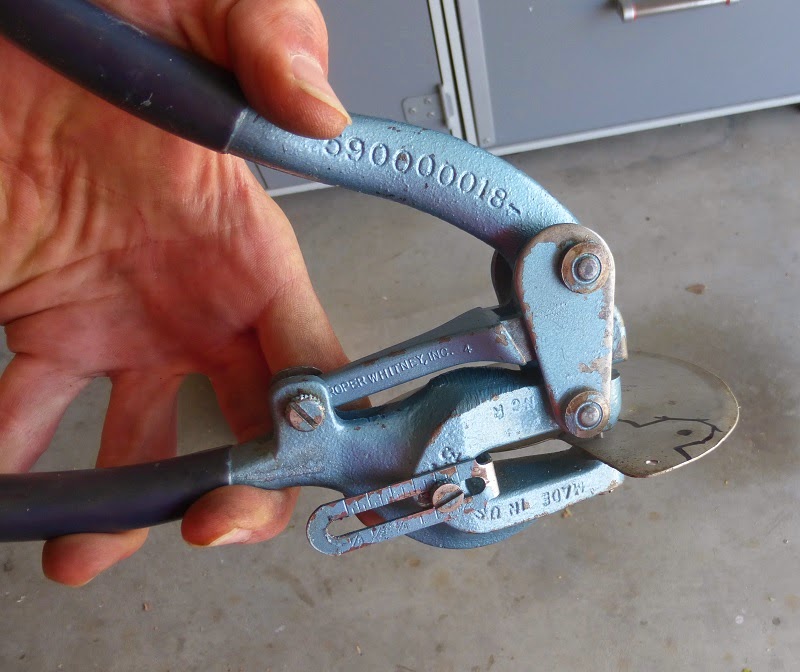
Another improvement over part 1, now I have a Whitney punch to put the holes in. A lot faster than drilling!
Then aviation snips to cut it out. As I look back at the old post: hacksaw a drawer slide? What was I thinking?
Scrap Attack has come quite a way in our methods. (and scrap stockpile!) Again, I put holes in the corners because round corners are 10x stronger than sharp ones.
Then filing to remove the sharp edges, after which I bent it with some pliers.
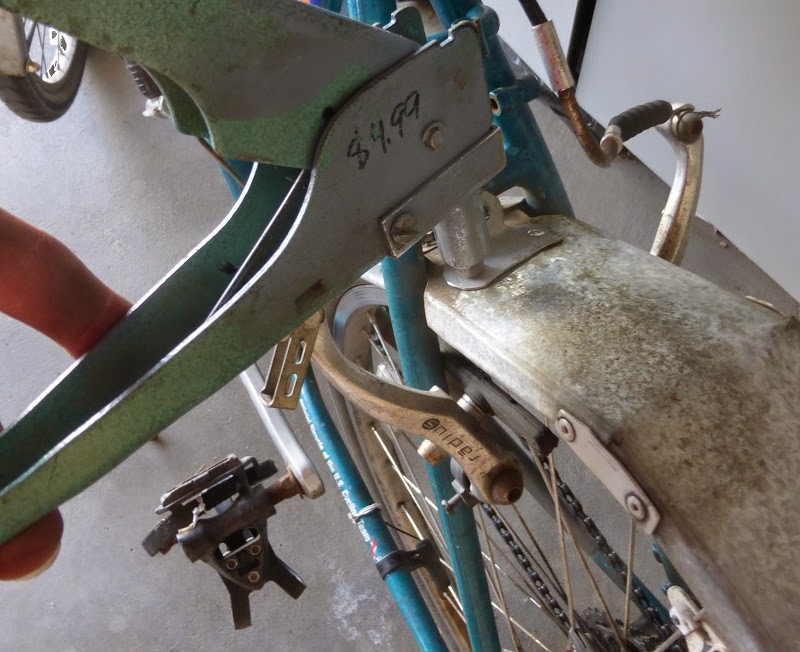
Then with my $4.99 pop rivet tool, attaching the new bracket on. I had to take off the rear rack to get clearance, but that's still better than having to remove the whole fender as well!
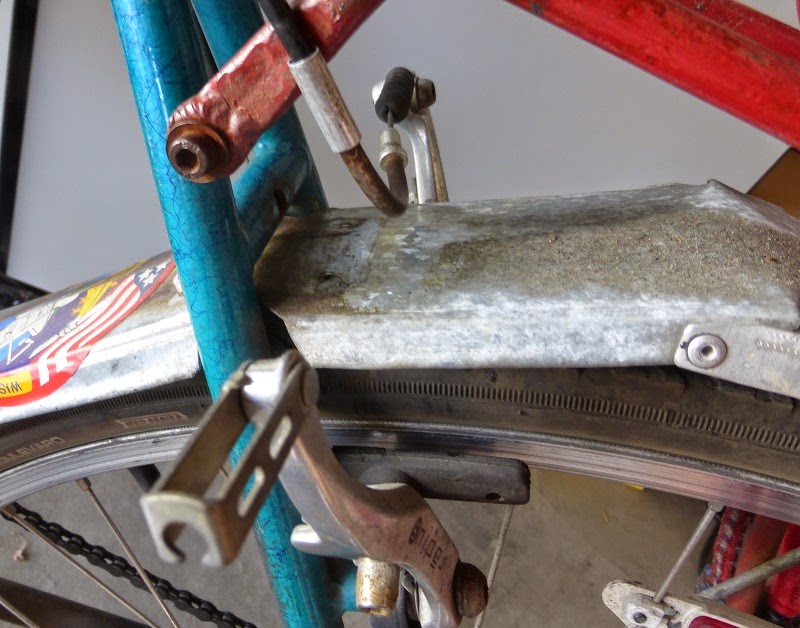
All done, and sturdier than ever!
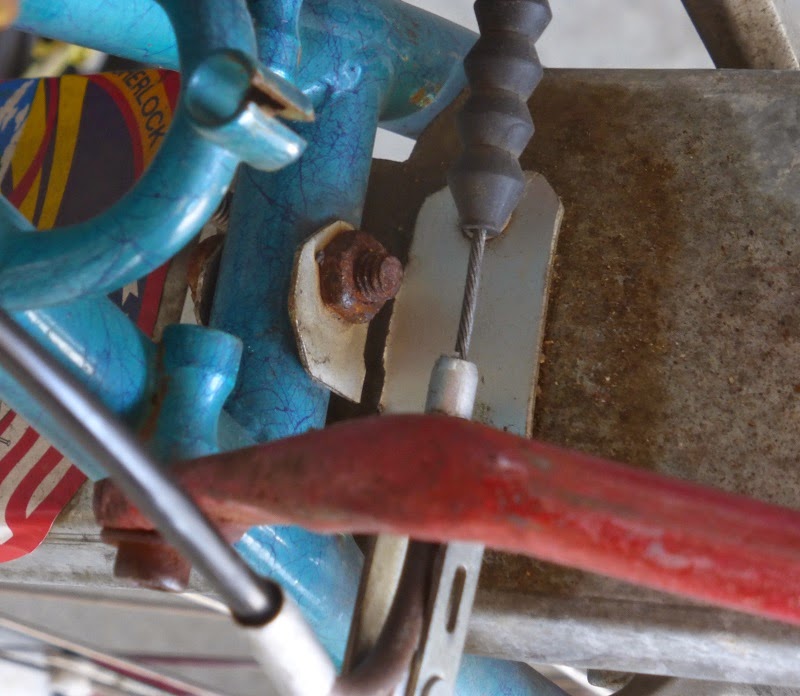
I like before and after pictures, or in this case, after and before.


No comments:
Post a Comment
Hi folks, please only leave comments relative to the blog post. All spam will be removed and spammers will be blocked.
Note: Only a member of this blog may post a comment.